Showing posts with label Recipes. Show all posts

Thursday, December 26, 2013

In the kitchen: mini Christmas cheesecakes.


Our Christmas dessert, like most desserts we make for just ourselves, had to be manageable to make and bake in one day. And by manageable, I mean small enough for us to remember that yes, it is just us who will be eating it. Though we have been known to make entire cakes for special occasions even if we're by ourselves, we're generally big fans of halving recipes or baking just enough cookies to last the night while freezing the rest. 

And that's why this cheesecake dessert was perfect. The original recipe called for 3-inch molds and cardboard rounds and parchment paper collars, but we went the easy way with our little Staub cocottes. There was definitely less work involved  because we didn't have to worry about measuring and trimming and cutting them just right to make perfect little round cheesecakes...sometimes presentation takes a back seat to comfort; there's something cozy about eating fluffy cheesecake out of a bowl instead of daintily cutting at a slice. 

While we were initially drawn to the recipe because the cheesecakes were topped with homemade wine gelées, we went the short and easy route and bought raspberry preserves to use as a topping instead. Maybe next time we'll play with port and rosé. Using the goat cheese instead of the traditional Philly-cream cheese packages that are usually called for in every single cheesecake recipe was completely worth it, and, as I've said before, give me anything with crème fraîche and I'll be happy. 


Mini Cheesecakes, via Food and Wine
-------------------------
3 Tbsp. unsalted butter, melted; more for brushing6 graham crackers
1/2 C, plus 1 Tbsp. sugar
1 egg yolk1 egg
1/4 tsp. salt
10 oz fresh goat cheese, softened 
5 ounces crème fraîche 
Jam, preserves, jelly (all-fruit...), anything you'd like for the topping. 


Preheat the oven to 325.

Brush the insides of four 3-inch cocottes or ramekins with butter. Make sure they're deep enough - about 2.5 inches. In a food processor, grind together the graham crackers, the melted butter, and 1 Tbsp. sugar. Pack the crumbs into the molds, and bake for 10 minutes. Let cool.

Beat the egg, egg yolk, salt, and remaining sugar at medium speed, about 3 minutes, until pale. Add the goat cheese and beat until smooth. Fold in the crème fraîche. Pour the mixture into the cocottes and smooth the top. Bake for about 30-35 minutes until just set, but not browned. Let cool at room temp, then refrigerate for at least an hour until chilled, but they can be chilled for several hours in advance. 

Top with a thin layer of preserves, and continue to chill until ready to serve. 

Oh, and I noticed that these photos are more of the vessels and tools that made the dessert instead of the actual dessert itself. Blame the new camera, and the fact that we ate our cheesecakes at night after a food coma induced by sous vide rib roast, roasted potatoes, horseradish cream sauce, popovers, Brussels sprouts and sun-chokes with pecans. No more room for food photos. 

To be fair, we ate the other two mini cakes tonight...see, moderation at its best! 

Saturday, December 7, 2013

In the kitchen: chocolate amaretto truffles.

  • 'Tis the season for Christmas parties. 

  • You're invited to a cookie exchange (please know I'm jealous of you). 

  • You have zero time (welcome to the club). 

  • You hate to bake (who are you?). 

  • You want to at least make the effort to bring something homemade (huge points in my book). 

  • I give you these. 


  •  They might actually be the easiest, no-bake dessert to make for the holidays. Oh, and the recipe calls for this. You can drink it if you like, but save some to mix with chocolate.  If it wasn't 10:30 in the morning when I made these the other day, I would've enjoyed a sip or two...

Chocolate amaretto truffles, adapted via Saveur and Julia Child
-------------------------
  • 8 oz. dark chocolate, melted
  • 8 tbsp. unsalted butter, softened
  • 2 oz. Amaretto liqueur
  • 2 Tbsp. strong-brewed coffee
  • 1 Tbsp. vanilla extract
  • 1/4 cup cocoa powder
  • 1/4 cup finely ground coffee
Melt the chocolate over a double boiler. Stir together butter, amaretto, coffee, and vanilla; add to the melted chocolate. Stir together until smooth and completely blended, and chill in the freezer for 10-15 minutes until firm. 

Whisk together cocoa powder and ground coffee in a small bowl. 

When the chocolate has hardened, use 2 teaspoons to make small truffles. It's best to not touch them with your hands to avoid melting the chocolate.  Roll in cocoa powder and coffee mixture, and set to to chill in the fridge until firm. This recipe will make 20-25 truffles, depending on how large they come out to be. 

And how easy was that? Enjoy with wine, the rest of what's left of the amaretto, or hot chocolate sent to you from your wonderful sister. I've done two of the above... 

Wednesday, December 4, 2013

In the kitchen: road trip hand pies.

When we're on the road from MKE to MN, I'm usually in such a "let's get home as fast as we can" zone that there's hardly anything that will make me stop...excluding some necessary coffee needs every now and then. Stopping somewhere for food is definitely not worth it to us, especially since these little hand pies are so easy to make. And, as an added bonus, we use up any leftovers before leaving for a few days; this makes the recipe really cost effective because you're using what you've already made. Plus-plus!


Hand Pies For the Road. 
-------------------------
Shortcrust dough, via Gordon Ramsey's Great British Pub Food

400 grams plain flour
1/2 tsp. fine sea salt
200 grams cold unsalted butter, cut into small cubes
3-4 Tbsp. ice water

Whisk together the flour and salt in a large bowl. Add the cold butter. Using a pastry cutter, cut in butter pieces until the mixture looks like coarse bread crumbs. 

Add in ice water and mix with a fork, just until dough comes together. If it seems dry, add a bit more water, but don't make the dough too wet. 

Lightly flour a work surface, and gently knead the dough into a ball. Wrap in plastic and leave to rest in the fridge for at least 30 minutes before rolling it out for the pasties. 

Ingredients to make 5 pasties***

3 medium potatoes, such as Yukon gold, peeled
1 large sweet onion
3 carrots, peeled
Leftover chicken or pork, about 2/3 cup shredded meat 
1 Tbsp. grainy mustard
Olive oil 
Salt, pepper 
1 egg, lightly beaten 

***I saved time the morning of our trip home last week by just cooking together the leftover potatoes, carrots, and pork shoulder Andrew had made for dinner the previous night. It really doesn't matter what filling you use for the pies - use anything you have on hand! 

Dice the potatoes, carrots, and onion into equally sized pieces. 

Heat olive oil in pan over medium heat, add vegetables and cook 5-8 minutes until tender. Add the chicken pieces and cook to warm through. Add in mustard, and season with plenty of salt and pepper. 

Preheat oven to 425. Roll out dough into 5 rounds to fit 3.5 inch baking dishes; leave an inch of overhang. Fill pasties with cooked filling, adding a bit more salt to each. Pinch overhang to seal, and brush with beaten egg. 

Bake for 25 minutes, until golden brown. 


And of course, as per any car trip, store in Tupperware containers and get ready to hit the road! 

Monday, November 25, 2013

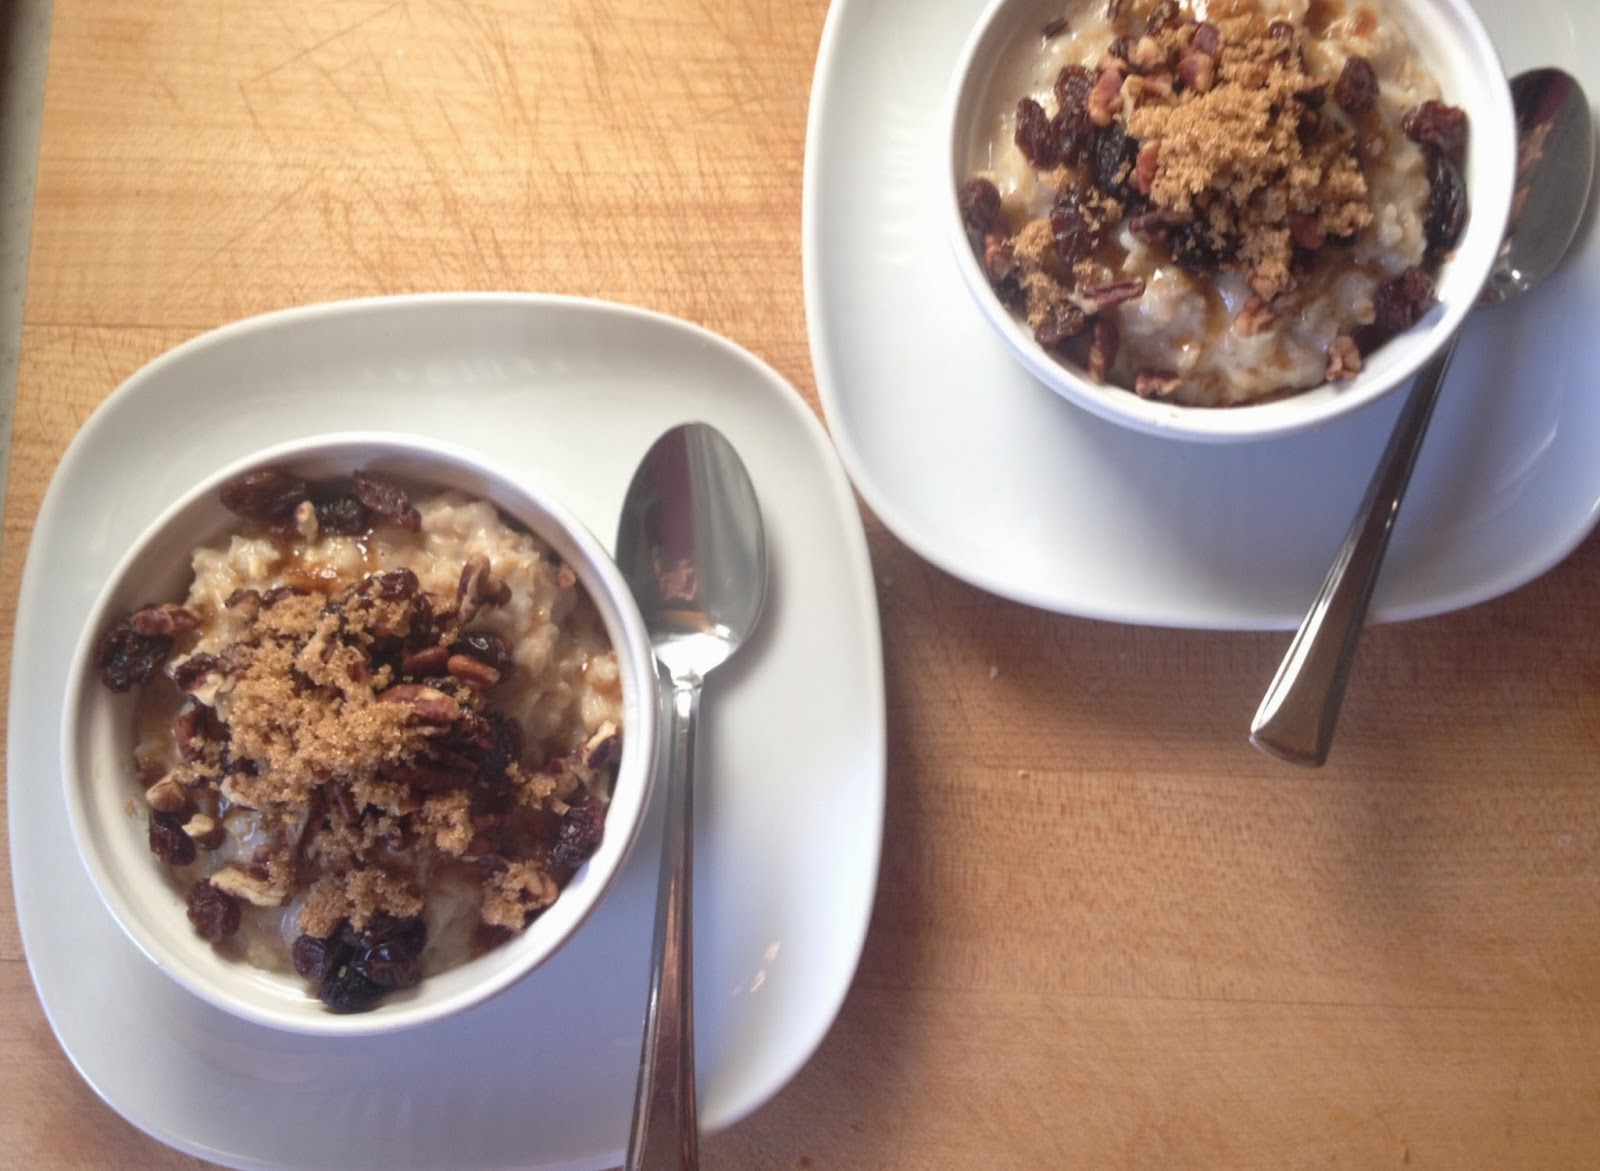
In the kitchen: the very best oatmeal.

Cold and snowy (yes, it's snowing!) mornings call for hot breakfasts, ideally with baked goods. There's something special about a cozy kitchen turning out warm and comforting dishes to start the day. This isn't easy to do during the week, or in my case, weekends, because my blankets, pillows, and an extra 10 minutes in bed usually win. However, even when I've given in to the snooze button on the alarm, I still have time to make oatmeal and satisfy my craving for a toasty breakfast.

{via}

When I was little, my mom would make us oatmeal before school. While that doesn't sound particularly like an exciting breakfast, the way she made it was just the best. Keep in mind, this was during the early 90s, before everyone became obsessed with steel-cut oats and those silly brown paper packets with flavored instant "oatmeal" were everywhere. In our kitchen, though, regular old fashioned rolled oats did the trick. And now, as I've grown up (and admittedly, have joined the steel-cut oat obsessed...this is one of my favorite recipes), I still find that there aren't many better breakfasts around than my mom's recipe. This takes me right back to my kitchen in MN...where we'll be in just a few days! To say I can't wait is maybe the biggest understatement of the week.


Brown sugar oatmeal, for two. 
-------------------------
1 3/4 C. milk 
1 Tbsp. brown sugar
1/4 tsp. salt 
1 C. old fashioned oats 
Pinch of salt 
Toppings: pecans, raisins, cinnamon, heavy cream...really, anything you want. 

Combine milk, sugar, and salt in a small saucepan. Bring to a simmer.

Add oats, stir to combine. Cook the oats for 3-5 minutes, then turn off the heat. Cover the saucepan, and let the oats steep for an additional 3 minutes.

Top with pecans, raisins, a pinch of cinnamon, and a spoonful of heavy cream. Enjoy with a giant mug of coffee, and savor the slow and hearty start to the day.

Friday, November 22, 2013

In the kitchen: Caesar salad dressing.


Caesar salad is, if made right, truly a comfort food. I know, I know - a comfort food with lettuce and anchovies? Really?  But there's something about the combination of tangy/salty/creamy dressing mixed with crisp greens that I can't get over. And as always, it's a million times better if it's homemade. 

I have played around with several different Caesar salad dressing recipes, and the one thing that drove me crazy each time I made a salad was preparing the anchovies. There's something about washing them to get rid of the little bones that a) isn't particularly enjoyable and b) gets rid of half the anchovy. I know there are recipes out there that don't call for anchovies, but for the purists, it's just not a Caesar without them. Enter anchovy paste. 


This little tube gives the salad that briny taste that is so necessary to a Caesar, but without the unpleasantness that is cleaning anchovy fillets. And that makes for a happier time in the kitchen.

The recipe below is the end product of testing several different recipes, and mixes my (Ukrainian) love for all things garlic with this classic salad.

Caesar salad dressing. 
-------------------------
3 garlic cloves 
1/2 tsp. anchovy paste
1/4 tsp. salt 
1/2 tsp. black pepper    
3/4 tsp. lemon juice 
1/2 tsp. Worcestershire sauce 
1 tsp. grainy Dijon mustard 
1 egg yolk 
1/2 C olive oil 
2 medium hearts of romaine lettuce 
1/2 C grated Parmesan cheese 
For serving: croutons, chicken breast 

Place the garlic cloves and salt in a mortar and pestle and mash together until a paste forms. Add the anchovy paste. 

Whisk in black pepper, lemon juice, Worcestershire sauce, mustard, and egg yolk until combined. Slowly whisk in the olive oil. Taste and adjust seasoning if necessary. 

Pour over chopped romaine, top with cheese and add croutons and chicken breast. Toss to combine. 

Makes two big salad bowls, perfect for a lunch date. 

Wednesday, November 20, 2013

In the kitchen: butterscotch pot de crème.

{via}

So let's not talk about yesterday's loss. The Ukes just couldn't get going; I knew it was going to be rough when, within the first three minutes of the game, France had two corners.

Instead, let's talk about one of my favorite desserts from one of my favorite restaurants in my absolute favorite neighborhood of Minneapolis. No hyperbole at all. We've been to Tilia quite a few times, for birthday brunches, summertime dinners, a particularly warm St. Patrick's day, and graduations. One afternoon, Andrew and I ordered their butterscotch pot de crème, created by Zoe Francois (who happens to be our go-to for all things pizza and bread). It was perfectly smooth, rich, and best yet, topped with a thin layer of crème fraîche. And then, we found that Zoe posted the recipe online.

I made these for our dinner party we had last week. Truly, this is such an easy dessert, but sounds so much fancier and more difficult than it actually is to make. I didn't grab a photo of the finished product...I actually had to run to grab the crème fraîche just a few minute before the appetizers went out. And that is reason number 23 out of 1098 of why it's best to live near two grocery stores.


Butterscotch pot de crème, via Zoe Bakes
-------------------------
2 Tbsp. unsalted butter
1/2 C brown sugar
2 C heavy cream  
1/2 vanilla bean, scraped; or substitute 1 tsp. vanilla extract
1/4 tsp. salt
4 egg yolks
Crème fraîche, for serving. 

Preheat the oven to 325.

Cook the butter and brown sugar over medium heat in a heavy saucepan, stirring with a wooden spoon, until the sugar has completely melted and the mixture starts to turn brown and turn smoke slightly.

Add the cream one cup at a time, cooking the butterscotch until the seized sugar cooks down again. Add the remaining cup of cream, vanilla, and salt.

In a medium bowl, whisk the egg yolks. Temper the yolks with a ladle or two of the cream mixture, whisking until warm. Pour the yolks back into the cream and slowly whisk to combine. Strain out the vanilla beans.

Divide the custard into four 4-ounce ramekins. Place them in a baking dish and pour in hot water to reach half-way up the sides.* Bake for 25-40 minutes, depending on the heat of the water and your oven. Once the custards have set, remove the pan carefully, and allow the custards to cool in the water bath. Cool until they come to room temperature, then cover and chill for at least one hour (but they can easily be made a few days in advance, which makes this a perfect dessert for parties!). Before serving, top with crème fraîche.

*I find it helpful to have a kettle of hot water going before you start tempering the yolks. That way the water is hot and ready to pour for the water bath, and it's easy to do without splashing up your kitchen.

I love these for so many reasons. Zoe says you don't have to serve it with crème fraîche if the contrast of the sour and sweet isn't your thing, but for this Uki girl, who can't ever get enough sour cream, the topping is absolutely necessary. Enjoy!

Monday, November 11, 2013

In the kitchen: salted butter chocolate chip cookies.

The other night, my husband called me a bad wife.

This came about when we both decided we wanted chocolate chip cookies for dessert, but didn't have any in the house. He reminded me that I used to make so many cookies and that now I don't make any, and that fact alone qualified me as a "bad wife."

Never mind that I had been at the office all day, or that we didn't actually have any chocolate on hand at the time of his request, or that he, too, could have gone out earlier to get the ingredients to make them. Apparently, I have been slacking. Right.

Despite that lovely comment, I braved the elements and trudged to the store (ignore the fact that we actually have two grocery stores within a two minute walk from our apartment...I'm going for drama here), and came back ready to bake.

I've linked to this recipe before, but below is the version I made last night; there's a bit less flour, so they're slightly less chewy and definitely more buttery. I think the best thing about these is the salt. Using flaky sea salt is the key to making these cookies so delicious. And if you sneak a spoon-full of batter to taste before baking, I won't tell...oh, and I did redeem my bad wifely qualities with these. Especially because I have extra dough in the freezer. 


Salted Butter Chocolate Chip Cookies, via David Lebovitz. 
-------------------------
1/2 C sugar
1/2 C brown sugar
1 stick cold unsalted butter, cut into pieces. 
1 egg
1/2 tsp. baking soda
1 1/4 C. flour
1/2 tsp. sea salt
1 1/2 cups semisweet chocolate chips

Preheat oven to 300. Adjust the oven rack to the top third of the oven. Line a baking sheet with parchment paper. 

Beat the sugars and eggs together until smooth, about 2 minutes in a stand mixer. Add in egg, vanilla, and baking soda. 

Stir together the flour and salt, then add them to the batter. Add chocolate chips and mix until incorporated. 

Scoop the dough into 10** balls (I use a rounded tablespoon of dough for each cookie). Space them at least 2 inches apart on the baking sheet, they do spread out a bit. 

Bake for 17 minutes, until pale brown. Remove from the oven and let cool on a wire rack. 


**The recipe makes enough for about 20 cookies, but since there are only two of us, I'll usually just make half and freeze the rest of the dough. And when the rest of the day has looked like this, having that batch of dough ready to be sliced and baked makes the night that much cozier. 


Tuesday, November 5, 2013

In the kitchen: roast pork loin with bacon and Comté cheese.

I've said it before, and I'll say it plenty more times: I have a fantastic husband. Not only is he extremely dedicated to his work and research, he's also a fantastic cook (I like him for other reasons, too, but for now, these praises suffice). This Sunday, after a long day of research, grading, and writing, he whipped up this for dinner.


Yes, that is pig, on pig (on pig). The kitchen smelled amazing as I walked into our apartment after spending Sunday at work. Andrew put his own spin on it by cooking the pork in the sous vide (see here for more), which ensured it wouldn't dry out, but the recipe below just requires regular roasting. As there are only two of us, this recipe left plenty (read, PLENTY) of leftovers, but I think it'd be great for a family get-together, too; maybe a pre-Thanksgiving dinner party?

Roast Pork Loin with Bacon and Comté Cheese, adapted from Stephane Reynaud's Rotis.** 
-------------------------
2 lb, 12 oz. pork loin
4 tablespoons olive oil
6 sweet onions, peeled and sliced into rings
6 slices of bacon; cook until crisp and set aside. 
7 oz. Comté (or Gruyere) cheese, sliced
4 green onions, finely chopped. 

Preheat oven to 350 F. 

Heat 2 tablespoons of the oil in a non-stick frying pan until lightly golden. 

Heat remaining olive oil in a roasting pan. Add the pork and brown on all sides over high heat. Once all sides are browned, roast pork in the oven for 1 hour, 20 minutes, basting it with its juices. 

Remove roast from the oven, let rest for about 5 minutes. Make 6 cuts about 2/3rds of the way through the roast; in each, place some fried onions, a slice of bacon, and a slice of cheese. Season with salt and pepper to taste, then return to the oven for another 10 minutes to melt the cheese. Sprinkle with green onions. 

**This book is fantastic. Roasts are really easy (and generally quite hands off), but for some reason I find lot of people are intimidated by them. Rotis is the perfect cookbook to help you break out of that. And besides, who wouldn't want to make their home smell like a French kitchen? 

Wednesday, September 25, 2013

In the kitchen: homemade pasta dough.

For Christmas this year, Andrew's parents bought us a KitchenAid stand mixer. After receiving the grinder attachment from my mom and the pasta attachment from my aunt and uncle, we have everything we could possibly need to make pasta and ragù from scratch, and not to mention the best and most generous family. 

Making pasta is something special. It's time consuming and takes some practice to get it right, but the results are so worth it in the end. It's definitely not an everyday activity (we're still big fans of Trader Joe's 99-cent rigatoni for those days time just gets away from us), but when you have a free Saturday afternoon, it's absolutely perfect. There's nothing quite as satisfying as enjoying a bowl of homemade pasta and a ragù that's been cooking away for several hours on the stove. 

We used the Sussman brothers' recipes from This is a Cookbook: Recipes for Real Life for both the pasta dough and ragù. My favorite time of year to cook from their book is during the fall, and we've had so much fun doing so in the past. Seriously, go buy this cookbook.  


Basic Pasta Dough, via The Sussman Brothers. 
-------------------------
1 c. semolina flour
2 c. all-purpose flour
4 large egg yolks
3 large eggs
Water

Combine the flours in the bowl of the stand mixer. Make a well in the center and add the yolks, whole eggs, and 2 Tbsp. water. 

With a fork, whisk the eggs lightly to blend, then begin mixing all the ingredients together by hand, drawing in flour gradually from the sides. Add a bit more water to help the dough come together into a ball, but not more than another tablespoon; you'll still want it to feel somewhat dry. 

Using the dough hook attachment, knead the dough on medium-low speed for about 10-15 minutes until it becomes stretchy and elastic. If you don't have a mixer, you can, of course, do this by hand, but note it'll take quite a bit more time to knead the dough. Wrap the dough in plastic and let it sit at room temp for at least 1 hour, and up to 12, before shaping. 

After the dough has rested, it's up to you to decide what kind of pasta to make! We love bucatini, but the pasta attachment has other shapes I can't wait to try, including fusilli. Or, you can roll out the pasta using a machine to make ravioli or lasagna sheets. And once it's shaped, fresh pasta only takes 3 minutes to cook: just wait for it to float to the top of a salted pot of boiling water and it's ready! Combine with a ragù, top with tomatoes and basil, or just add olive oil, some freshly grated Parmesan cheese and black pepper. Make sure to have a glass of wine, too: salute! 


Tuesday, July 9, 2013

In the kitchen: zucchini salad.

Or, to go with a different title, "Cooled." Yes, we finally installed the A/C (fine, Andrew did, but I helped). I feel bad for complaining because we promised during this last never-ending winter that once the temperature reached above 50 and even if it climbed to 90 we would keep quiet and not whine about how hot it was...but my level of tolerance was quickly dwindling in this humidity. So I feel only slightly, kind of, a tiny bit bad for complaining. 


Before today, we only had the ceiling fan in the living room so the rest of the apartment missed out on any cool air that it might provide; this meant the kitchen was especially rough. This salad, though, hit the spot for dinner after a hot day: it's refreshing, crisp, and light, the perfect summer side. And if you have a mandoline, it's done in no time, meaning you get out of the kitchen that much faster. 


Raw Zucchini Salad, via Michael Ruhlman. 
-------------------------
2 zucchini 
2 tsp. salt, plus more to taste
1 Tbsp. minced shallot
1 garlic clove, minced
1 Tbsp. lemon juice
2 Tbsp. olive oil 
1/4 cup slivered almonds 
Black pepper

Cut the zucchini thinly on the bias, julienne, or use a mandoline slicer. Put them into a colander and sprinkle with 1 teaspoon salt. Toss, then add the second teaspoon of salt. Let stand for 10-20 minutes. Meanwhile, combine the shallot, garlic, and lemon juice. 

Taste the zucchini; if it's too salty, briefly rinse the squash under water and pat dry. In a medium bowl, toss the zucchini with olive oil, then add the shallot mixture. Add almonds, and season with pepper (and more salt/lemon juice, if necessary). 


Serve chilled and stay cool! 

Wednesday, July 3, 2013

In the kitchen: strawberry hand pies.

{via}

It's almost July 4th, which means it's time for grilling, picnics, and fireworks! I've always loved going to see fireworks; we went every year when we were little (over time, the fireworks for the 4th have been overtaken by the those for the Minneapolis Aquatenniel, but that's a post for another day). This year, we'll be taking in Shorewood's festivities: there's a parade that goes down our street, a jazz band concert, and of course, fireworks over the lake. 

A few weeks ago, we were flipping through Bon Appetit's latest issue and found these perfect little pies. We used strawberry jam (homemade - thanks, Andrew!) instead of the blueberries, but I think any summer fruit would work just as well. And they were lovely! The recipe makes 6 hand pies, which is perfect for the two of us - enough for dessert, then breakfast and a snack the next day. 

Since we'll be spending most of the day outside tomorrow, we figured these pies would be an easy dessert to accompany our Fourth of July picnic that Andrew's already started preparing. Side note: I do have quite an amazing and talented fiance who, last night, made BBQ sauce, pickles, pickled red onions, strawberry jam for the pies...AND dinner, and then prepped the pork for grilling. Eat your hearts out, girls! My major contribution was making the dough the other day...I know. Huge help. 

Strawberry Hand Pies, adapted from Bon Appetit. 
-------------------------
1 1/2 cups flour
1/2 tsp. sugar
1/4 tsp. salt
1/2 cup chilled unsalted butter, cut into 1/2-inch pieces
Strawberry jam (for a quick berry filling, quarter hulled strawberries and toss with 1 tsp. lemon zest, 1 Tbsp. lemon juice, and 1/4 cup sugar; leave to sit until the juices run) 
1 egg, whisked with 1 tsp. water
Sugar, for sprinkling 

To make the pie crust: 
Pulse dry ingredients in a food processor. Add butter, and pulse until all ingredients are combined, with a texture of course meal. Add 1/4 cup ice water and continue to pulse until dough comes together, adding more water if dry. Form into a square, cover with plastic, and chill in the fridge for at least two hours. Let the dough sit at room temperature for 15 minutes before rolling. 

(Note you don't have to use a food processor - I usually don't, and just incorporate the butter with a pastry cutter). 

To make the pies: 
Preheat oven to 375. Roll out dough on a floured surface to a 15x12-inch rectangle. Cut into 6 rectangles. Brush edges of rectangles with water. Spoon some berry filling in bottom half of each rectangle. Fold over the dough and press edges to seal. Place pies on a parchment-lined baking sheet, brush with egg wash, and sprinkle with sugar. Cut slits in tops.

Bake hand pies, rotating halfway through, until the dough turns golden, about 35 minutes. Transfer pies to a wire rack to cool slightly. Serve warm or at room temperature...at room temp, they taste like a much (MUCH) better version of strawberry pop-tarts! 

These will be the perfect sweet treat for our picnic. Oh, and I think maybe we need this to start. 

Happy (almost) Fourth! 

Friday, June 21, 2013

Car crash cookies.

No worries, everyone's ok. Everyone except our Avtochko...but he will be fine eventually.

Yesterday, as I was leaving work, I found pieces of my car on the road next to where it was parked. It took a second for me to realize that someone had hit it, but then I saw the note on my windshield (thankfully, there was a note on the windshield!). Apparently an employee of a construction company wasn't paying enough attention to his turns or had some spacial awareness issues. Anyway, long story short, the front of the car is currently strapped on with little plastic ties, the light is broken but will be taped up until it can get properly repaired, and there's quite the scratch that will need a serious paint job. Avtochko will just not look as pretty for a while.


It was a bit of a process to deal with last night (and this morning), but when I came home from work yesterday, I was so glad to have some cookie dough ready in the freezer...and a gin and tonic poured and waiting for me, thanks to my wonderful fiance. I had made the dough for a batch of these peanut butter cookies earlier in the week and thought ahead to not bake the entire amount just then, which made last night's dessert a quick and easy process. I have to admit they didn't turn out as well as they did earlier this week - my mind was elsewhere (and Hannibal was on - anyone else love to be scared by that show?!). But still, this just goes to show how great - and necessary - it is to have cookie dough on hand in the freezer.


Peanut Butter Cookies, adapted from Smitten Kitchen. 
-------------------------
1 1/4 cups flour
3/4 tsp baking soda
1/2 tsp baking powder
1/4 tsp salt
1/2 cup unsalted butter, softened
1 cup peanut butter (we both like the chunky kind!) 
1/2 cup sugar, plus more for sprinkling 
3/4 cup brown sugar
1 egg
1 Tbsp. milk
1 tsp vanilla extract 
 Chocolate chips, as many as you want! 

Preheat oven to 350. In a large bowl, combine flour, baking soda, baking powder, and salt; set aside. 
In the large bowl of a mixer, beat the butter and peanut butter for several minutes until combined and fluffy. Add sugars and beat until smooth. Add the egg, milk, and extract, scraping down the sides of the bowl. Slowly add the flour mixture and beat until dough comes together. Stir in the chocolate chips. 

Drop the dough by a tablespoon onto a baking sheet lined with parchment paper; sprinkle with extra sugar. Make sure to leave plenty of space between each cookie, as the dough expands quite a bit. Use a fork to make a criss-cross pattern on the cookies. 

Bake for 8-10 minutes. The cookies will look underdone, but they're not, they're just perfectly soft and chewy. Leave them on the baking sheet for about a minute, then transfer to a rack to cool completely. 

I've found that 8 cookies per sheet works well. This ensures you won't eat the entire batch (trust me, you may want to) and leaves plenty of dough to freeze for tomorrow's dessert, unexpected visitors, or emergency situations, as above.  
Related Posts Plugin for WordPress, Blogger...